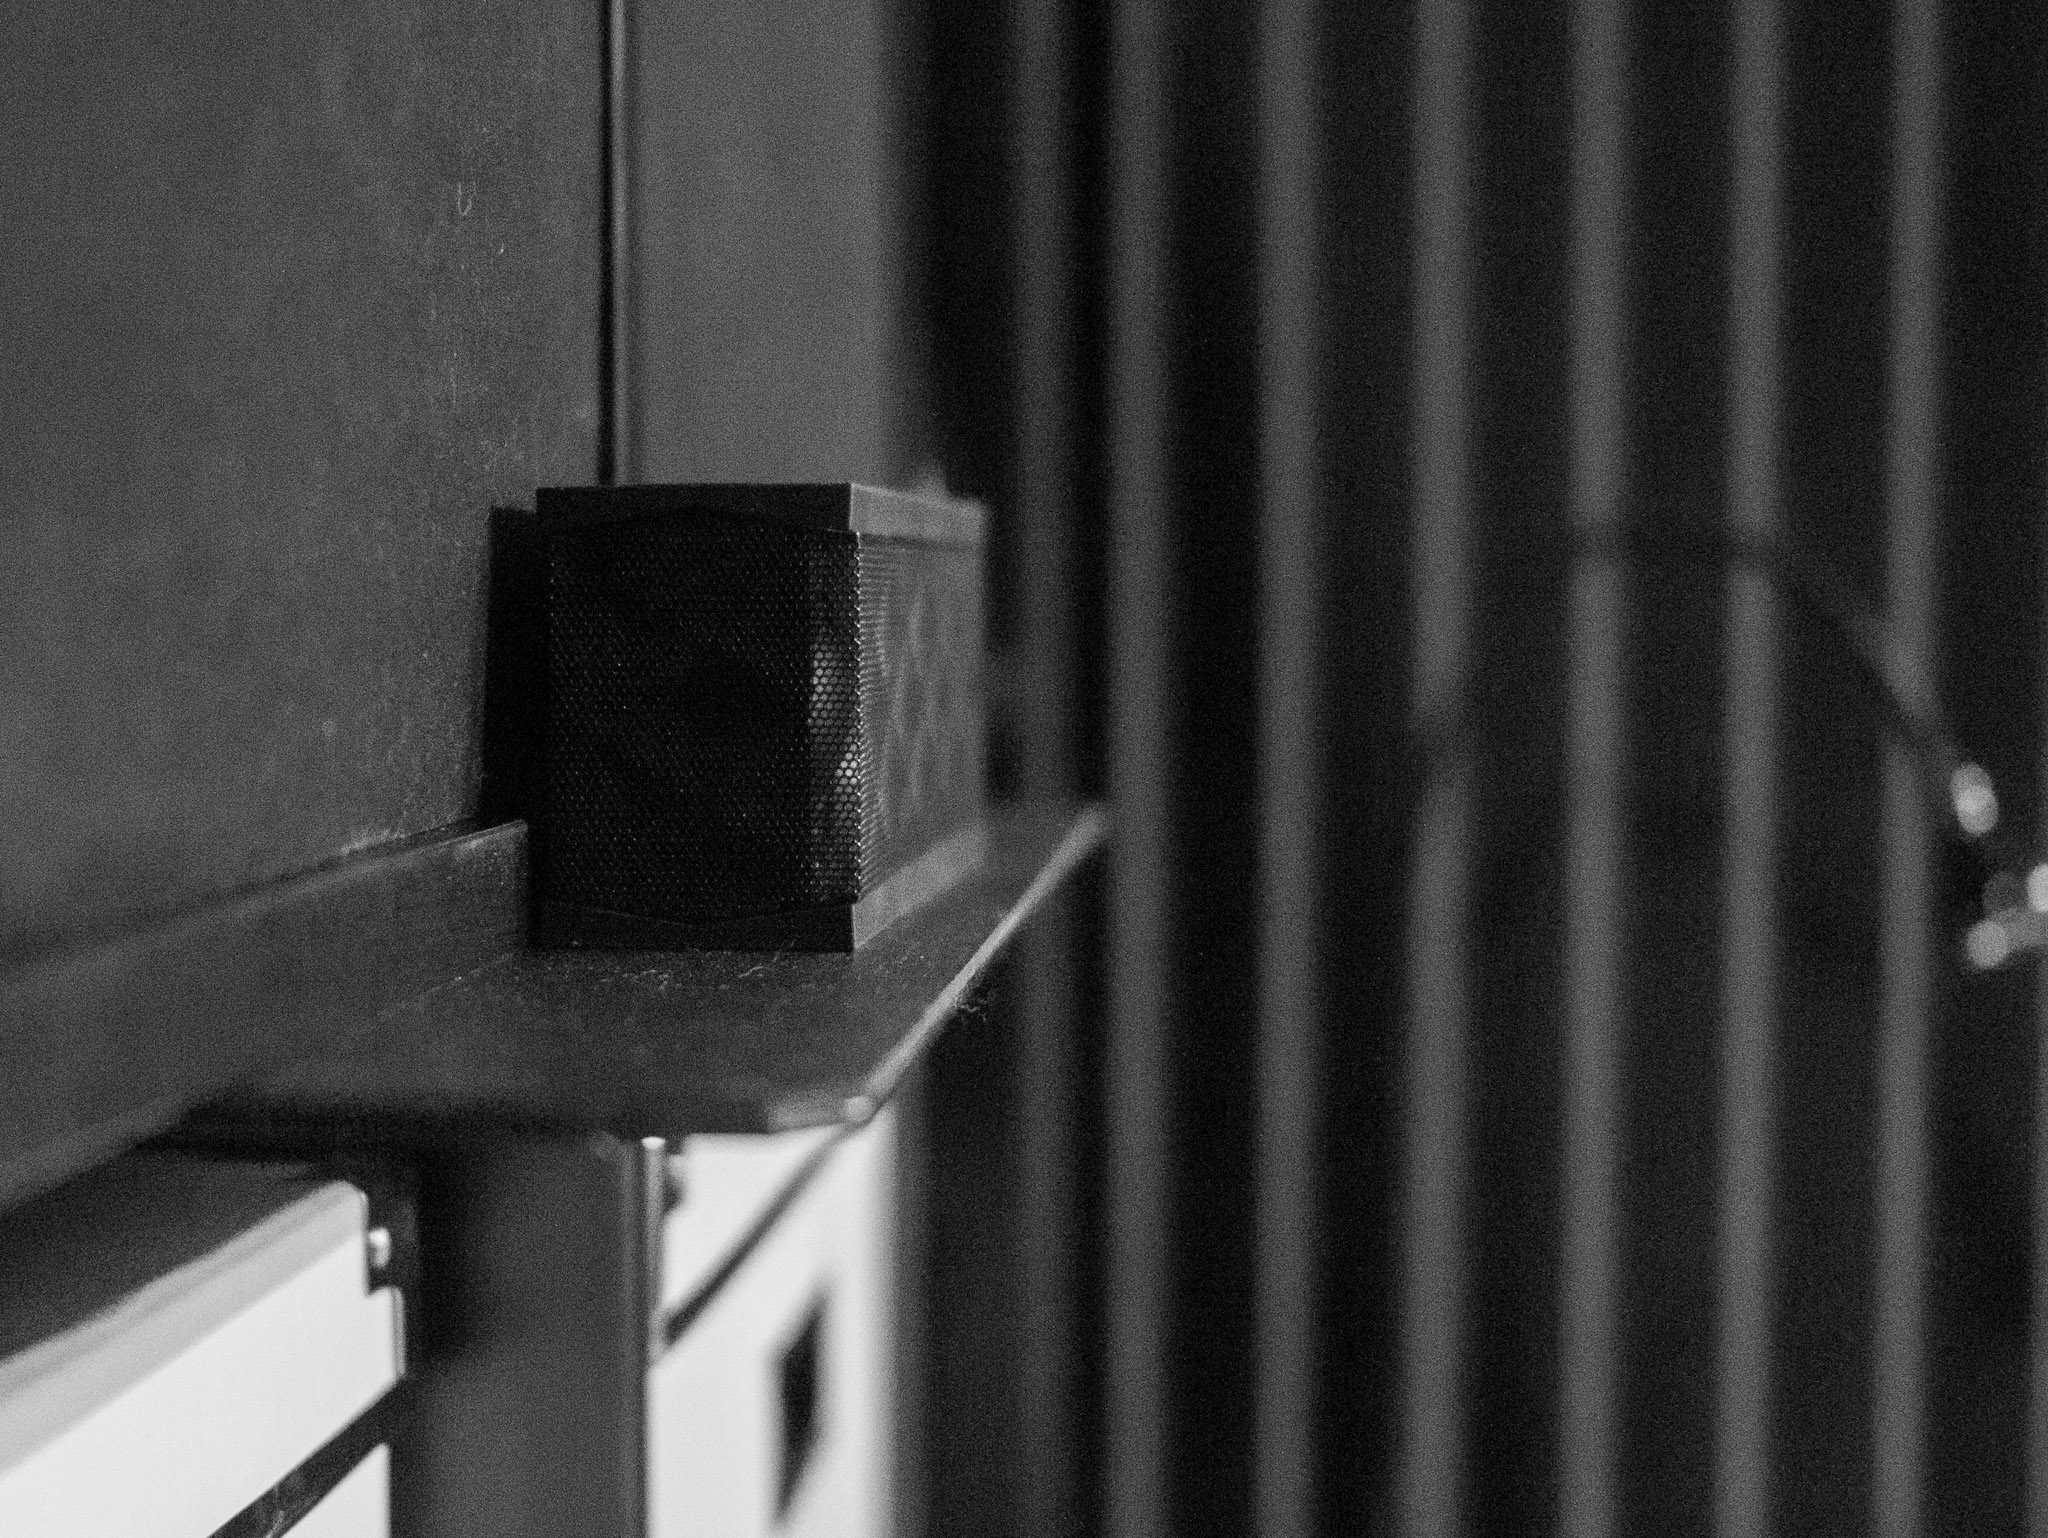
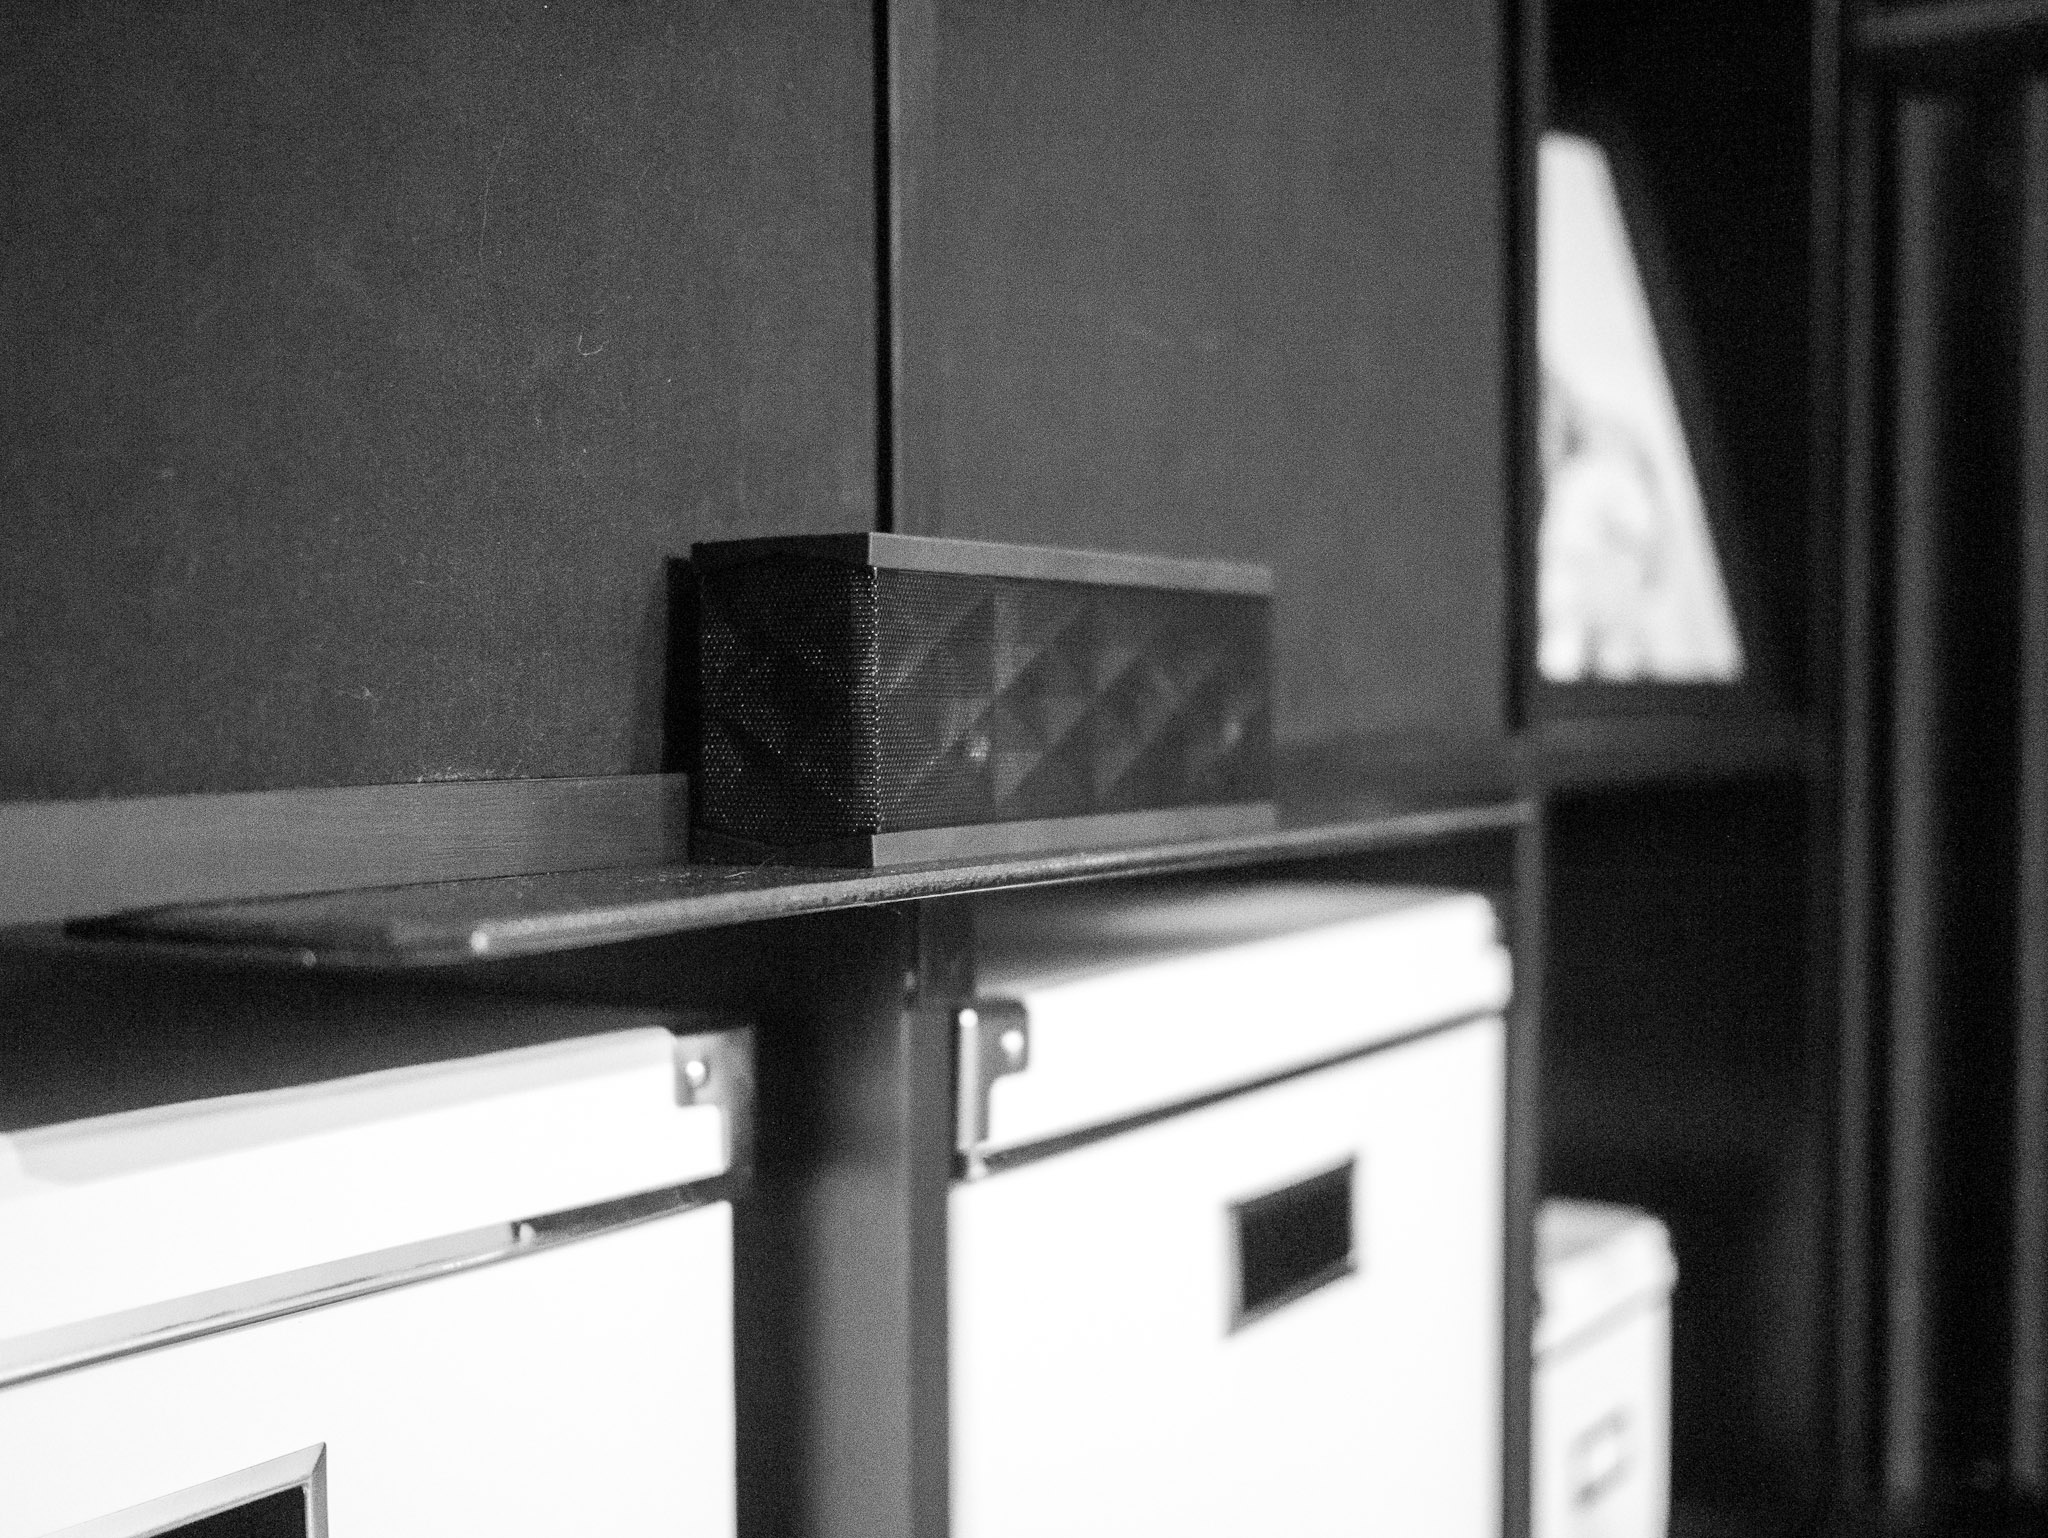
I recently moved my desk so that instead of being against a wall, the back side of the desk is against a large [Ikea bookshelf](http://www.amazon.com/exec/obidos/ASIN/B0050PEC2W/ref=nosim&tag=brooksreview-20). Since I have had this particular desk I haven’t found a truly good spot for my [Jambox](http://www.amazon.com/exec/obidos/ASIN/B004E10KI8/ref=nosim&tag=brooksreview-20) — a spot the centers the device with my head so that I can get decent sound out of it.
This, was bugging me.
In looking at how my desk centered on the shelf and the height of the shelf unit, I thought it would be great to build a little shelf that the Jambox could sit on that stuck out from the Ikea shelf.
So I did just that, and the end result is one of the thinnest and strongest shelves I have built — so I thought I would share.
I basically notched a piece of steel, painted it, covered it with foam, and screwed it in place. That’s the simple explanation, but for those of you that don’t know what I just said I will go through step by step.
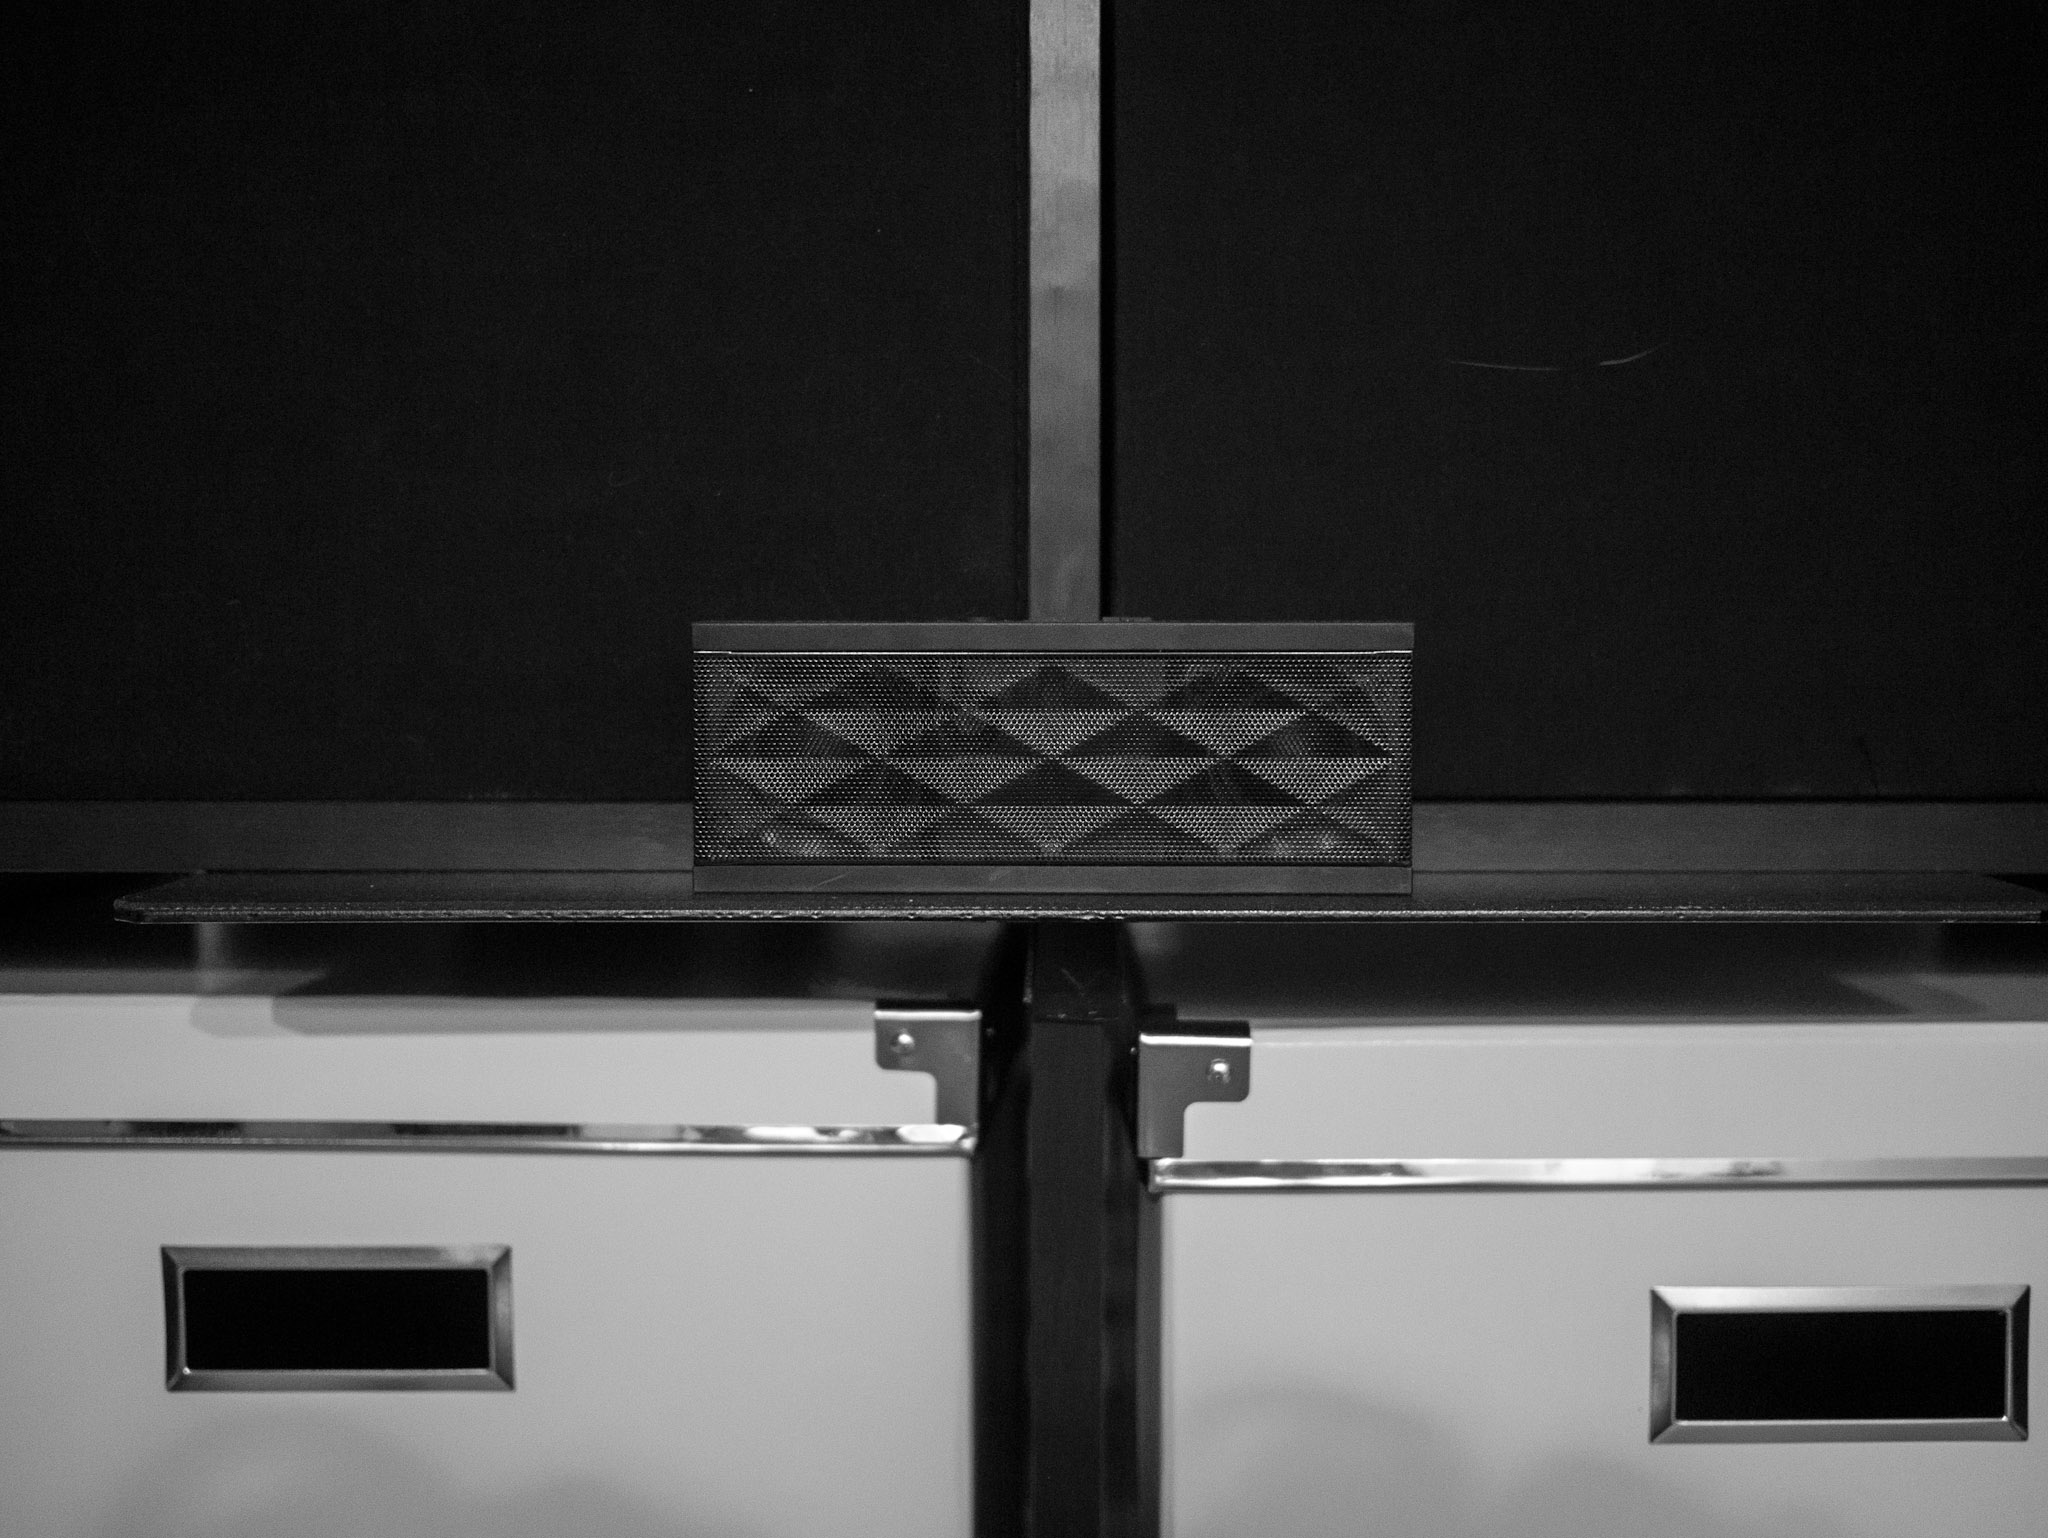
Here’s what we want to end up with:

To get there you need to buy, or have, the following supplies:
– [Hacksaw](http://www.amazon.com/exec/obidos/ASIN/B00002X227/ref=nosim&tag=brooksreview-20), with [saw blades](http://www.amazon.com/exec/obidos/ASIN/B002KHNCQ0/ref=nosim&tag=brooksreview-20).
– [Metal File](http://www.amazon.com/exec/obidos/ASIN/B001R1QCE4/ref=nosim&tag=brooksreview-20)
– [Simpson Strong-Tie](http://www.amazon.com/exec/obidos/ASIN/B003YHEEDU/ref=nosim&tag=brooksreview-20) (this is the shelf)
– Some sort of liner to put on top, I used something like [this](http://www.amazon.com/exec/obidos/ASIN/B002AS9NGC/ref=nosim&tag=brooksreview-20).
– [Some black spray paint](http://www.amazon.com/exec/obidos/ASIN/B002BWOS6C/ref=nosim&tag=brooksreview-20).
– Spray glue, [I used this](http://www.amazon.com/exec/obidos/ASIN/B0002BBV2S/ref=nosim&tag=brooksreview-20), but this [low strength stuff](http://www.amazon.com/exec/obidos/ASIN/B0000AZ735/ref=nosim&tag=brooksreview-20) should be fine.
– Screws (sorry, no Amazon link for these)
– A [screwdriver](http://www.amazon.com/exec/obidos/ASIN/B0015SBILG/ref=nosim&tag=brooksreview-20) or a [screw gun](http://www.amazon.com/exec/obidos/ASIN/B0046RE72K/ref=nosim&tag=brooksreview-20) of some sort.
– [Some pliers](http://www.amazon.com/exec/obidos/ASIN/B00004SBCU/ref=nosim&tag=brooksreview-20).
### Step 1
Now that you have all the goods, time to get started. Remember we want this:
Since my shelf spans over the vertical divider on the shelving unit I had to notch the shelf (you can skip this, and buying a hacksaw and blades, if you don’t need to span over a vertical support). Just measure the width of the shelf you need to span so you know how wide your notch needs to be. Make two marks centered on the metal where your cuts need to be and how far down. Saw down about an inch, or enough to get the holes to be safely inside the edge of whatever material you will be screwing the shelf into.
Once you have two cuts made, you just bend down the ‘tongue’ that you created with your pliers. This will also act as additional support, but mostly saves you all the trouble of having to cut off that flange in a clean manner.
Now that this is done your metal cutting is over — short lived as it was.
### Step 2
Now grab your file. The goal here is to file every rough edge, or corner, on the metal so that it is smooth. Focus on the parts that will be exposed — also if your cut was crooked or wavy, you can smooth it a bit with the file. Take long smooth strokes with the file pushing it away from you and not pulling it back (lift it off the surface). Pay attention to the corners that are beveled already.
Once you are happy with how smooth the metal edges are, you can move on — but this is your only chance to smooth them.
### Step 3
Now it’s time to paint. All you want to do is coat the entire piece of metal with the paint color of your choice.
#### Some Tips
1. Don’t try to coat everything on one pass. Slowly build the paint to avoid runs in the paint.
2. Clean the surface thoroughly before painting.
3. Don’t do this indoors.
4. Let the paint fully cure overnight so that you can work with the shelf without getting finger prints embedded in the paint.
5. Don’t be afraid to re-coat if you need to, read the side of the paint can for directions on how long to wait before re-coating.
6. Spray past the ends of the metal for complete coverage.
7. Be sure to paint the edges of the metal as they will show.
### Step 4
Once the paint is dry, it is now time to affix the liner to the shelf. Roll out your liner on a workbench and put the top of the shelf down on the liner. Cut a rough shape out of the liner using a knife or scissors, leaving enough overhang on each side. (This makes the fine tuning step easier.)
Once cut out, you will need to place the liner and the shelf on some cardboard. Place the liner face down and the shelf face up (the side you want to be up on the shelf, should be up).
Now spray both the liner and the shelf with the spray glue you purchased — don’t go crazy, just one pass will do.
**Make sure to get from edge to edge — that is most important.**
Now spray glue is messy, but it is effective. Wait about 15 minutes or so and pick up the liner — carefully.
You will now place it on the shelf, glue-side to glue-side. Be sure to leave overhang on each edge.
#### Tip
I tend to start from the center and smooth outward with spray glue to avoid all bubbles.
### Step 5
Now that the liner is on the shelf, and you have given it 20 minutes or so to setup, we can trim the edges. I just took the shelf and placed it liner side down on a workbench I didn’t mind cutting into and took a box knife to trim the edges of the liner off. For the tongue I took and cut the notches in the liner and rolled it down onto the tongue so that it too was covered.
### Step 6
Your shelf is done, now it is time to install it. If you laid out the shelf correctly there should be pre-drilled holes in the metal that you can feed the screw through. If not you can drill a couple of holes.
Two screws should be good on either end to hold most items — I put four in for symmetry.
You are done.