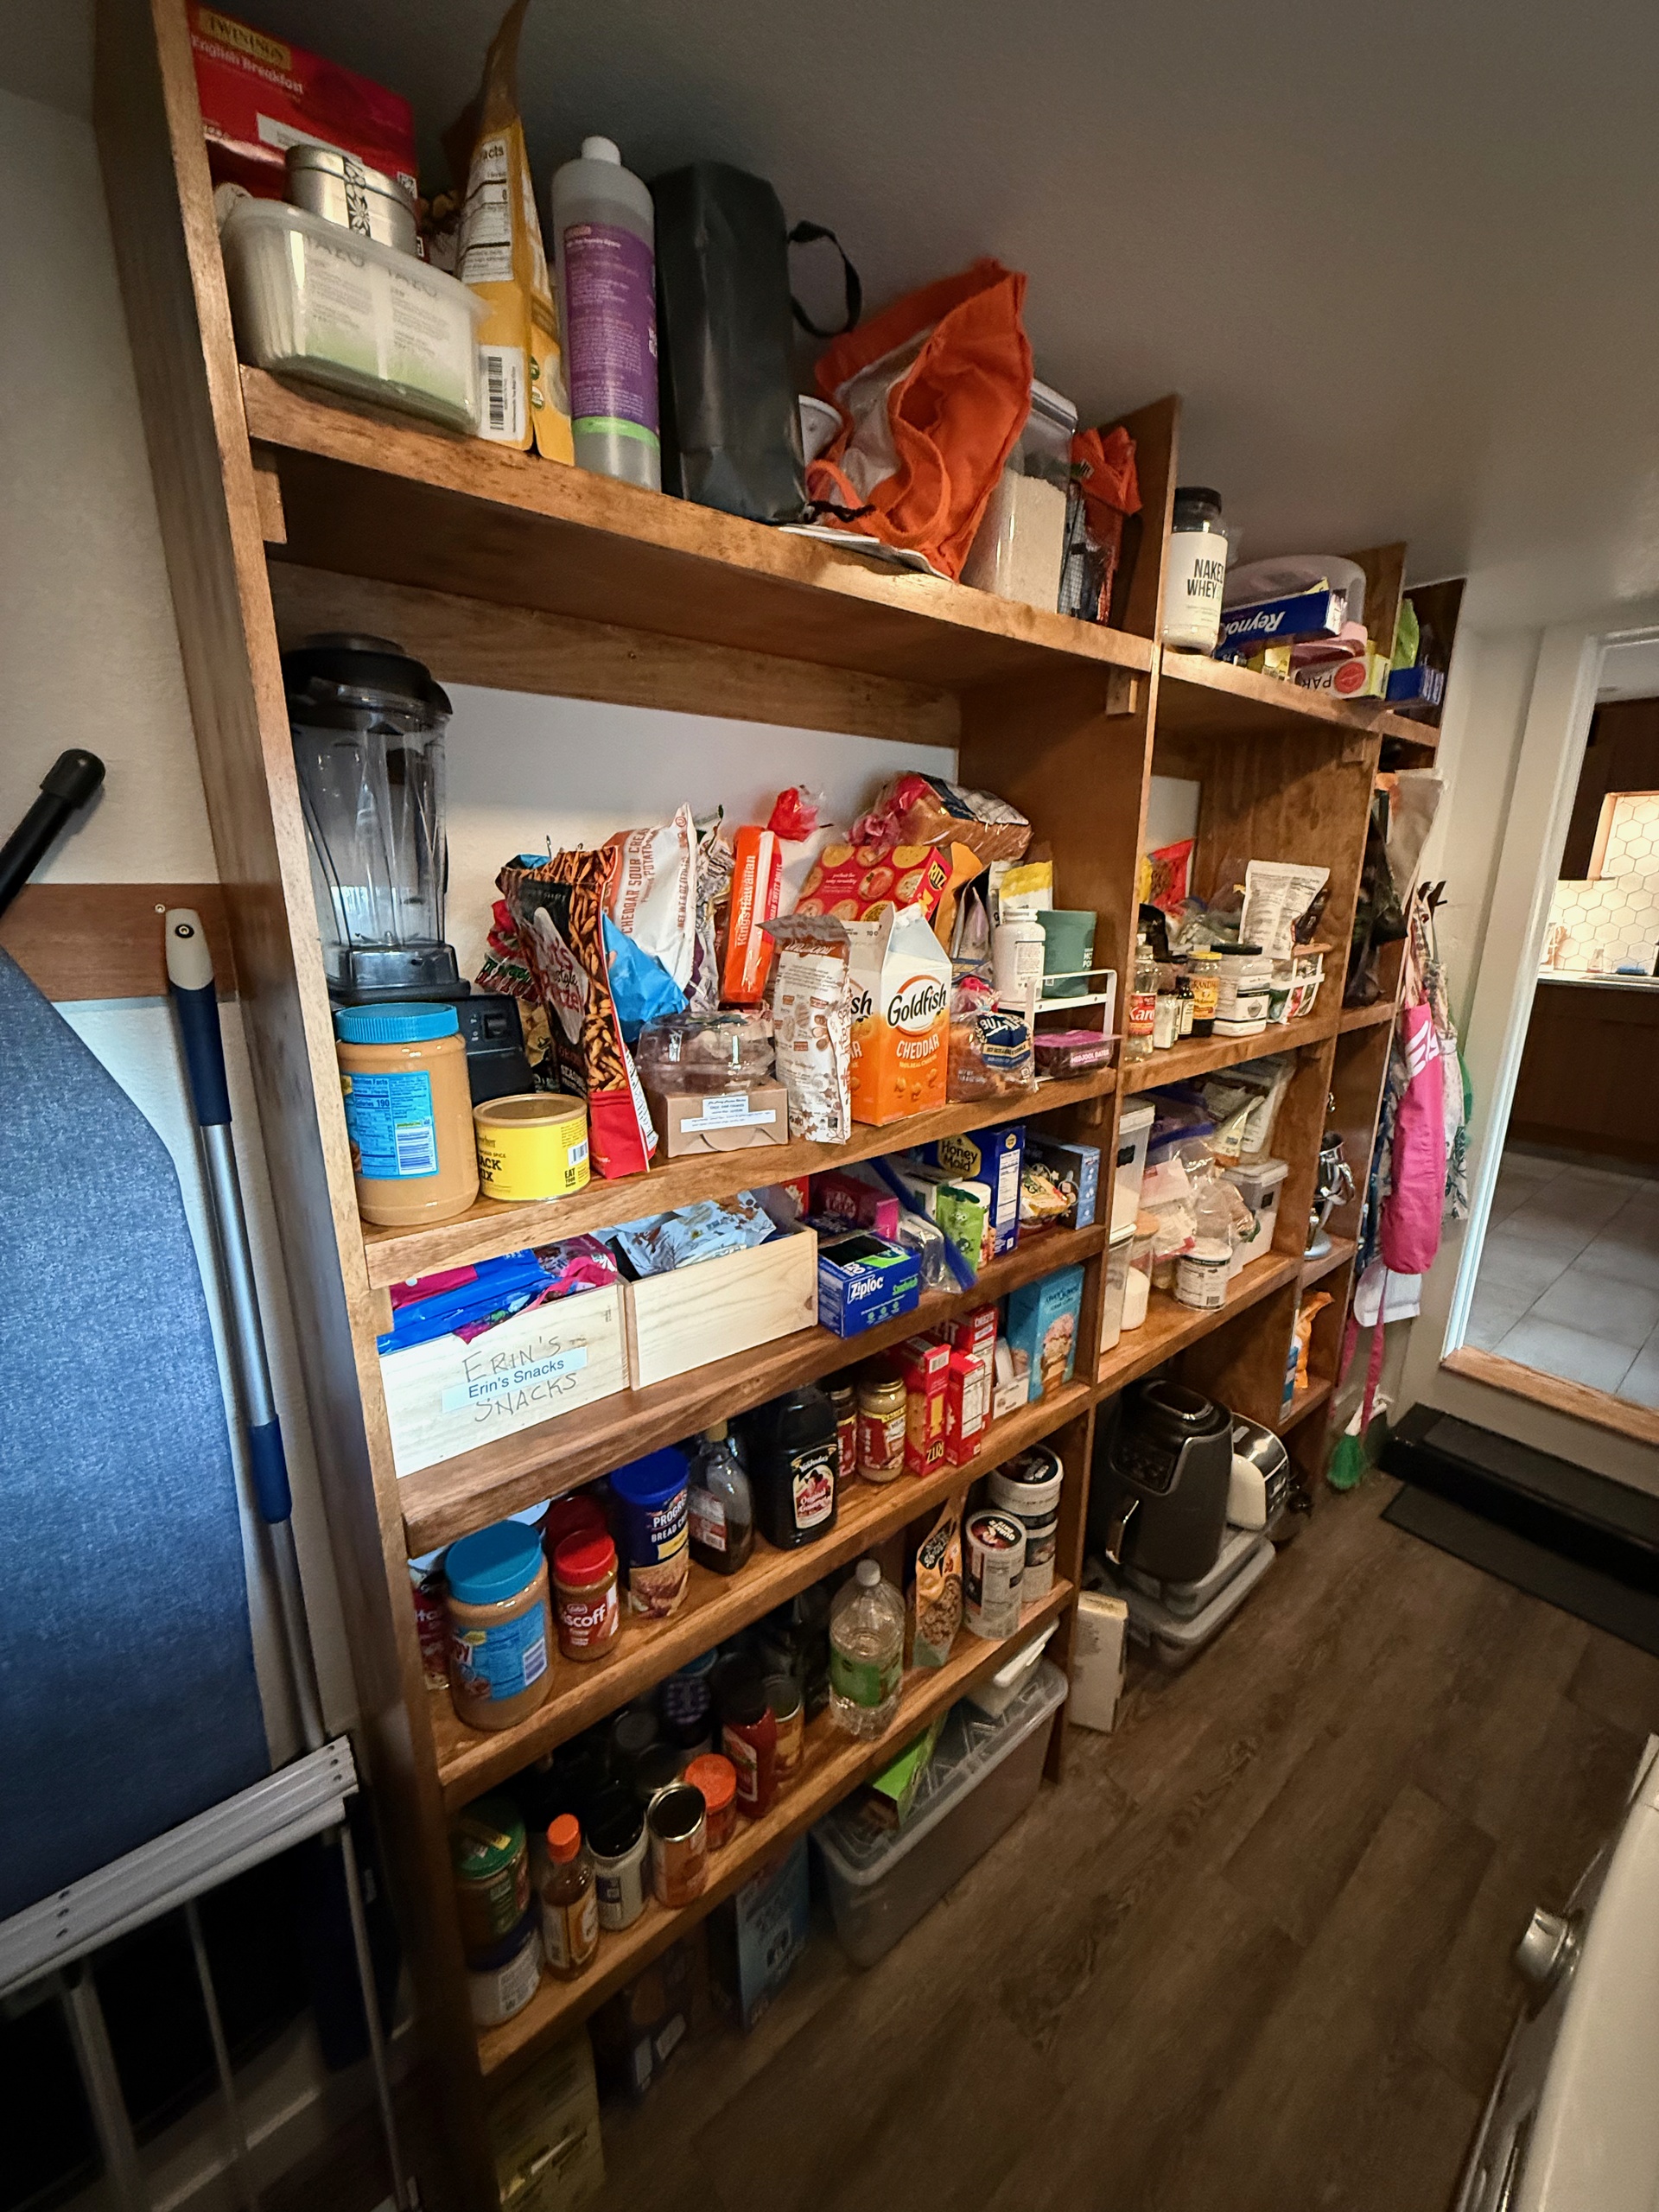
We’ve been talking a lot about tools, well, I have been, and some of you have been reading along. I thought I would also share some of the projects I’ve been building. First, I want to say — and this might be the only time I say something like this — if you are hoping to learn skills to build these things, then you are much better off with YouTube for this one. It would be tedious to write this all out, so instead I am going to talk through the projects like this: the concept, what I did and why, and lastly what I would do differently next time. I am not going to get into many of the details of the construction of these, unless there’s something I fucked up or found particularly clever.
First up: our pantry shelving.
Concept
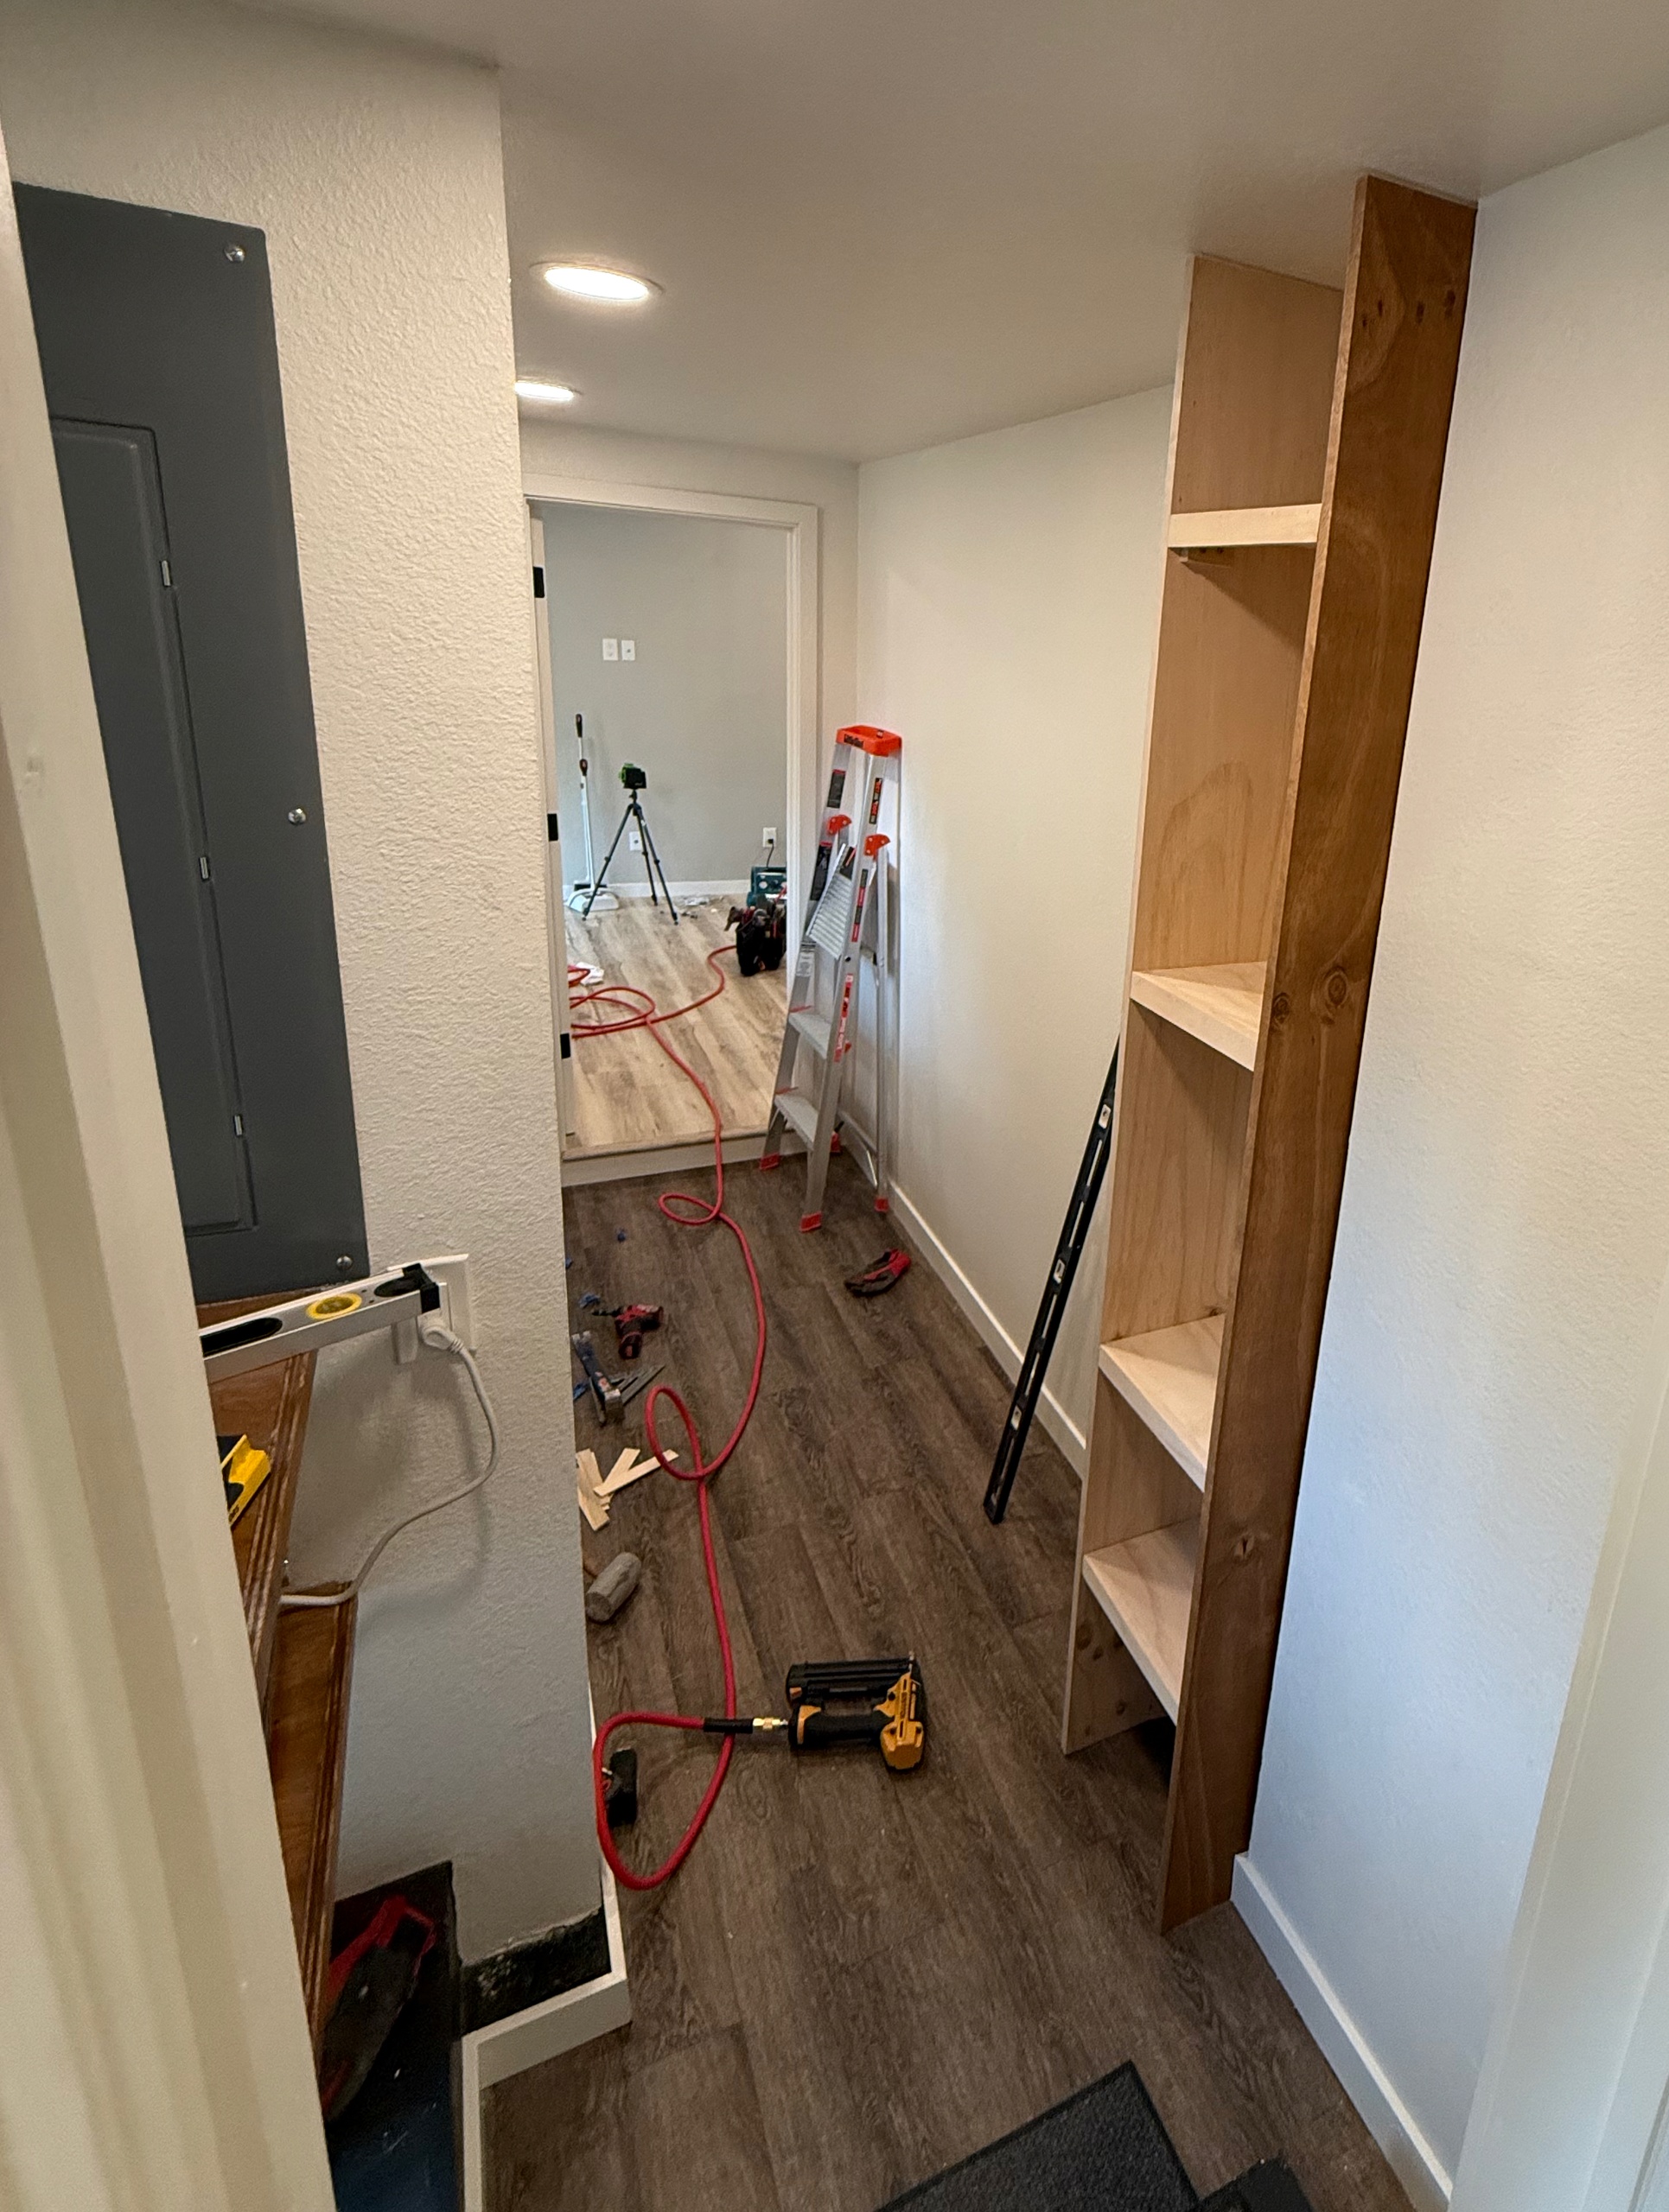
Our house has a two-car garage, which was converted to living space, but there’s a hallway between the kitchen and that space. That hallway is the only place you could put a pantry, and it’s also where the washing machine and dryer are set up. The benefit of this area is that there’s enough width for shelving, and there’s a lot of height in the room, so you can make loads of shelving.
This was the first project I tackled, and I was on a timeline. This was one of the projects that had to be done before we could move in. I designed three sections: a full wall of heavy-duty, floor-to-ceiling shelves; another full shelf across the top of the washer and dryer; and a coffee/microwave/toaster-oven nook with a couple of shelves and a really big fucking drawer for baking supplies my wife needs to store.
Initially, I designed a large cubby-style grid of shelves with 5 verticals and many more shelves, but my wife said she hated that. I then measured out a bunch of the stuff she stores and redesigned the system so that they are long, wide shelves with a lot more height to them. This opened up the design to her liking and removed the need for any lighting, as everything was much more open, but it necessitated nosing to reinforce the shelves so they don’t deflect under weight.
Pretty simple, all plywood, screws, and done.
What I Did & Why
The best plywood you can typically get at Home Depot is Sande plywood, so that’s what I built this out of (they do sell some Baltic birch, but it’s usually pretty crappy). Sande is priced alright; if you are picky, it’s mostly flat, but that’s about the end of it. I bought about 4 sheets of 3/4″ Sande for this.
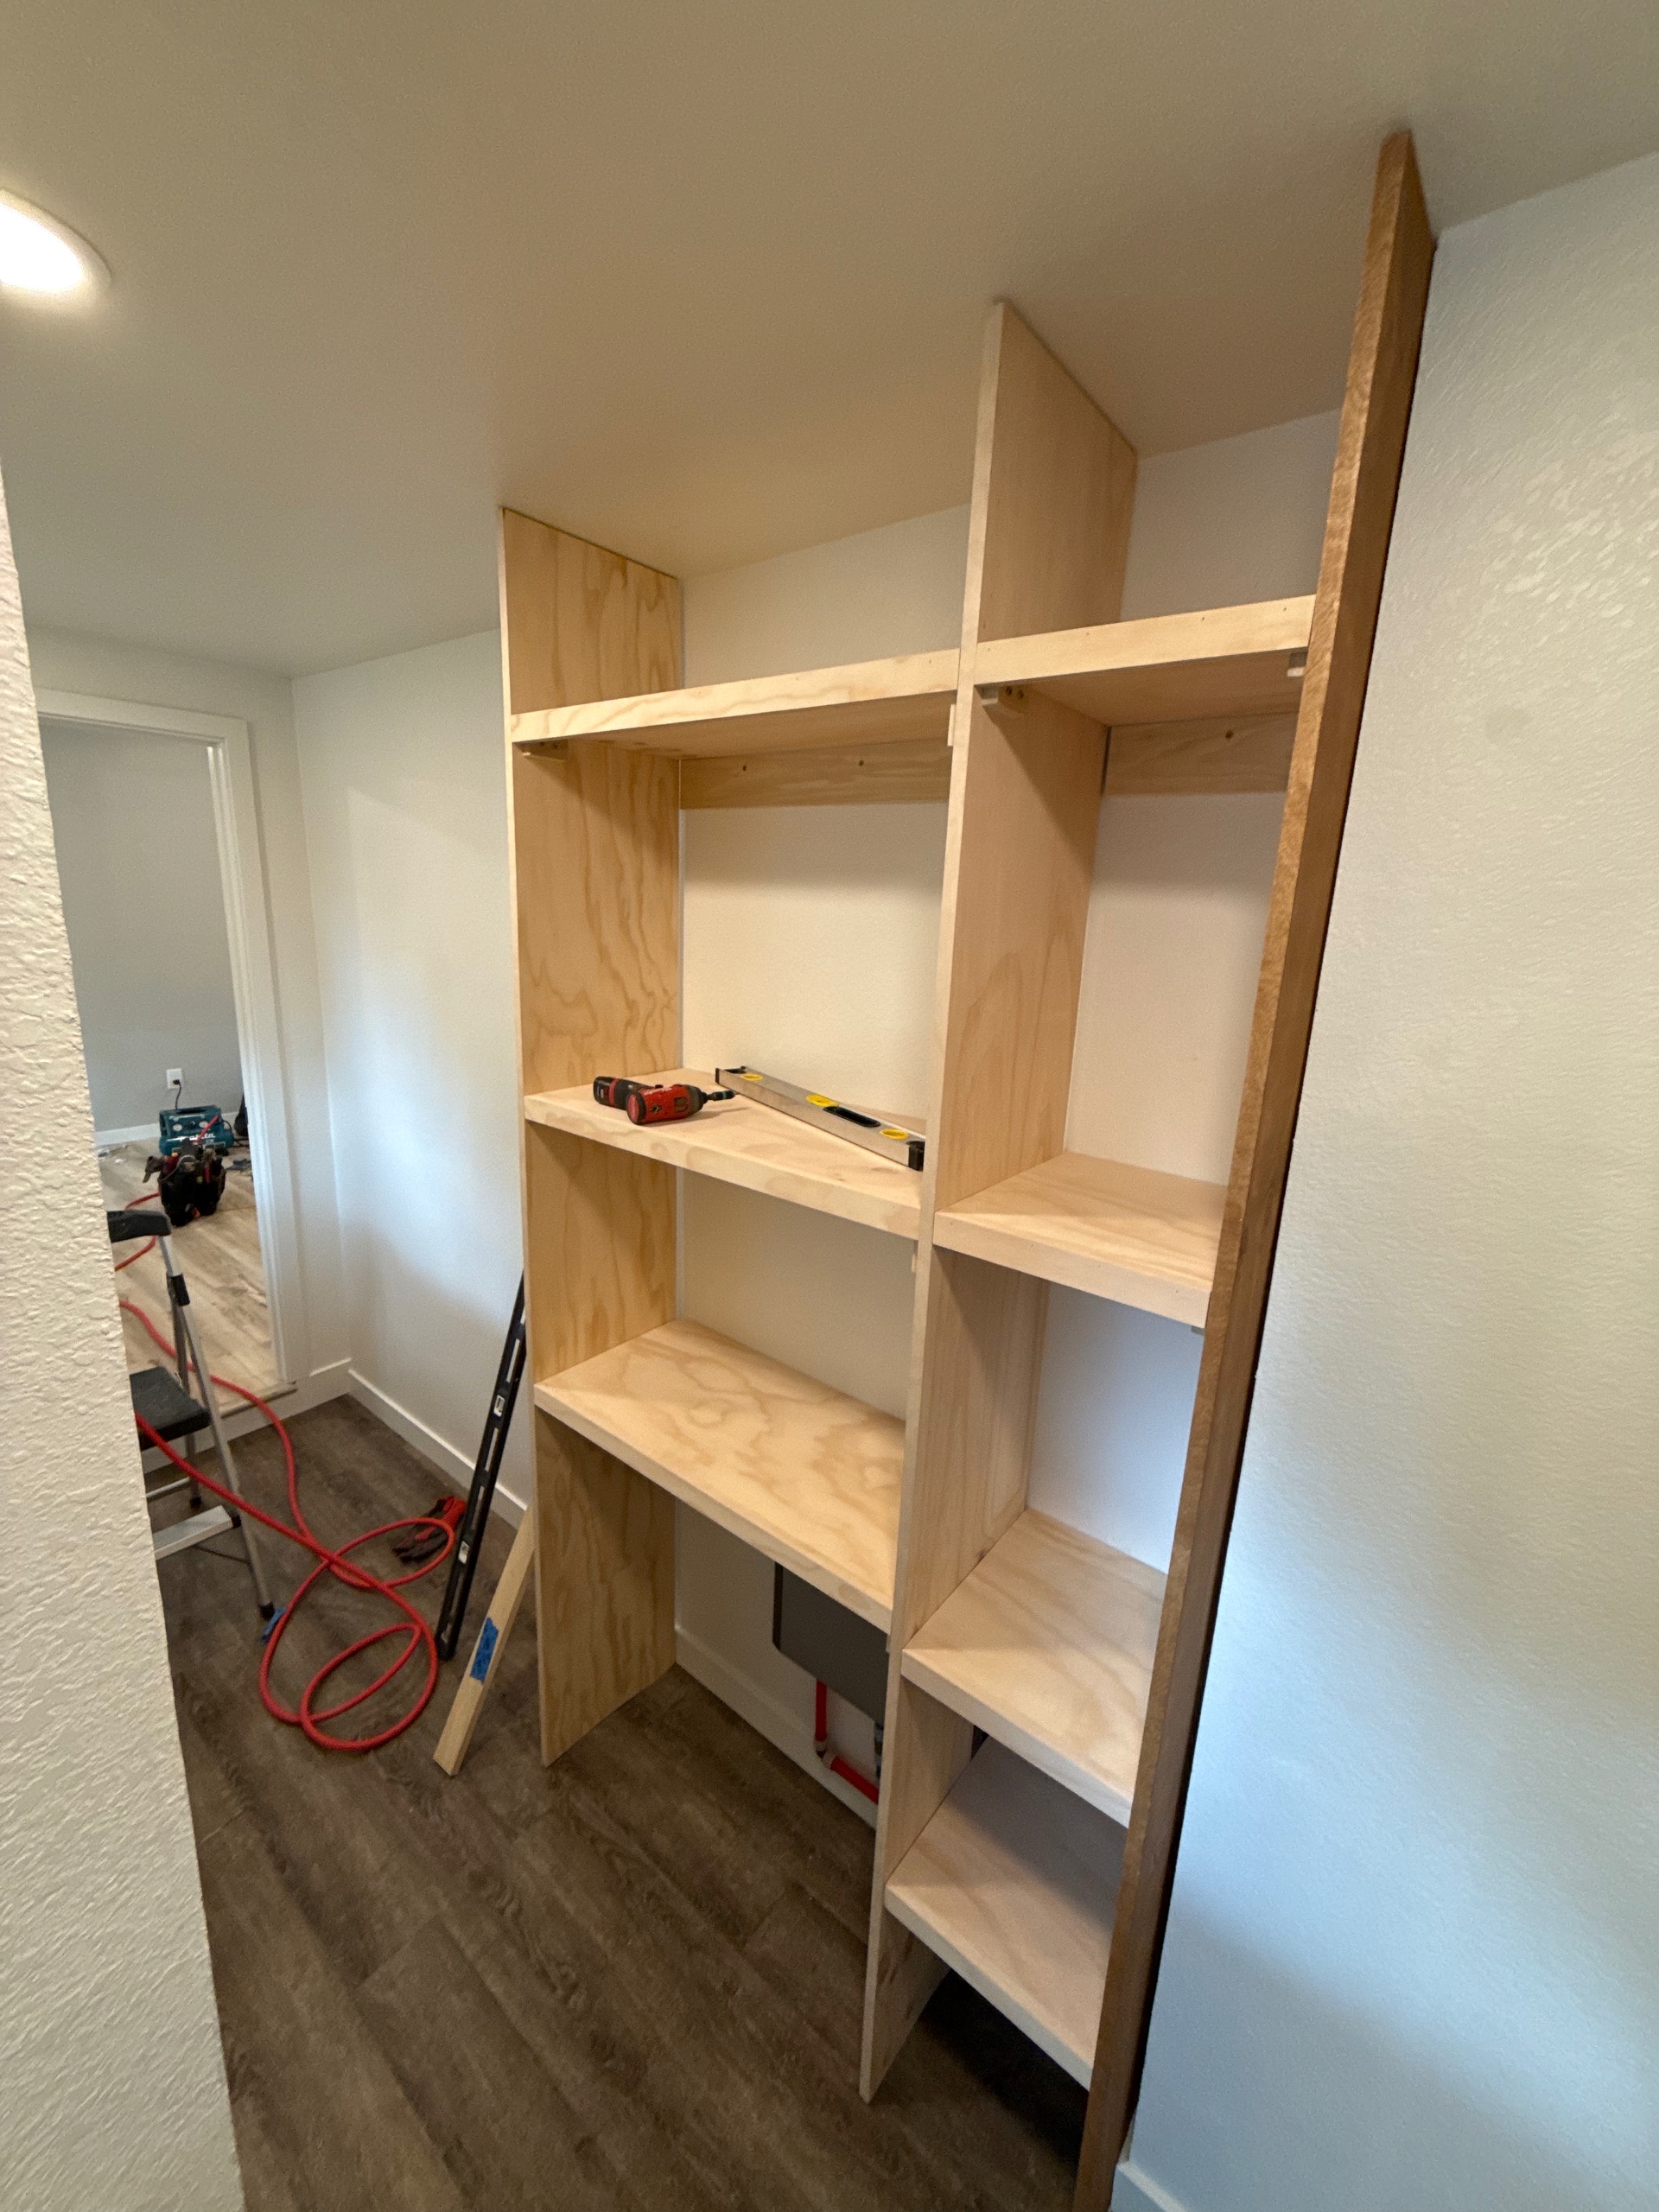
The build is simple for the pantry shelves: plywood supports from floor to ceiling. Poplar rails along the wall, screwed into the studs, and poplar cleats at the front edge of each shelf. The shelves are plywood, with a 1.5″ rip of plywood attached to the face for nosing to keep all the sag out of it. Everything on this build uses large screws, 15ga nails, and, in a few spots (like the nosing), glue to help hold it. I used edge banding for the pantry shelves, but not for the washer shelf and coffee nook, as I wanted those to have a little more utility vibe. I don’t know.
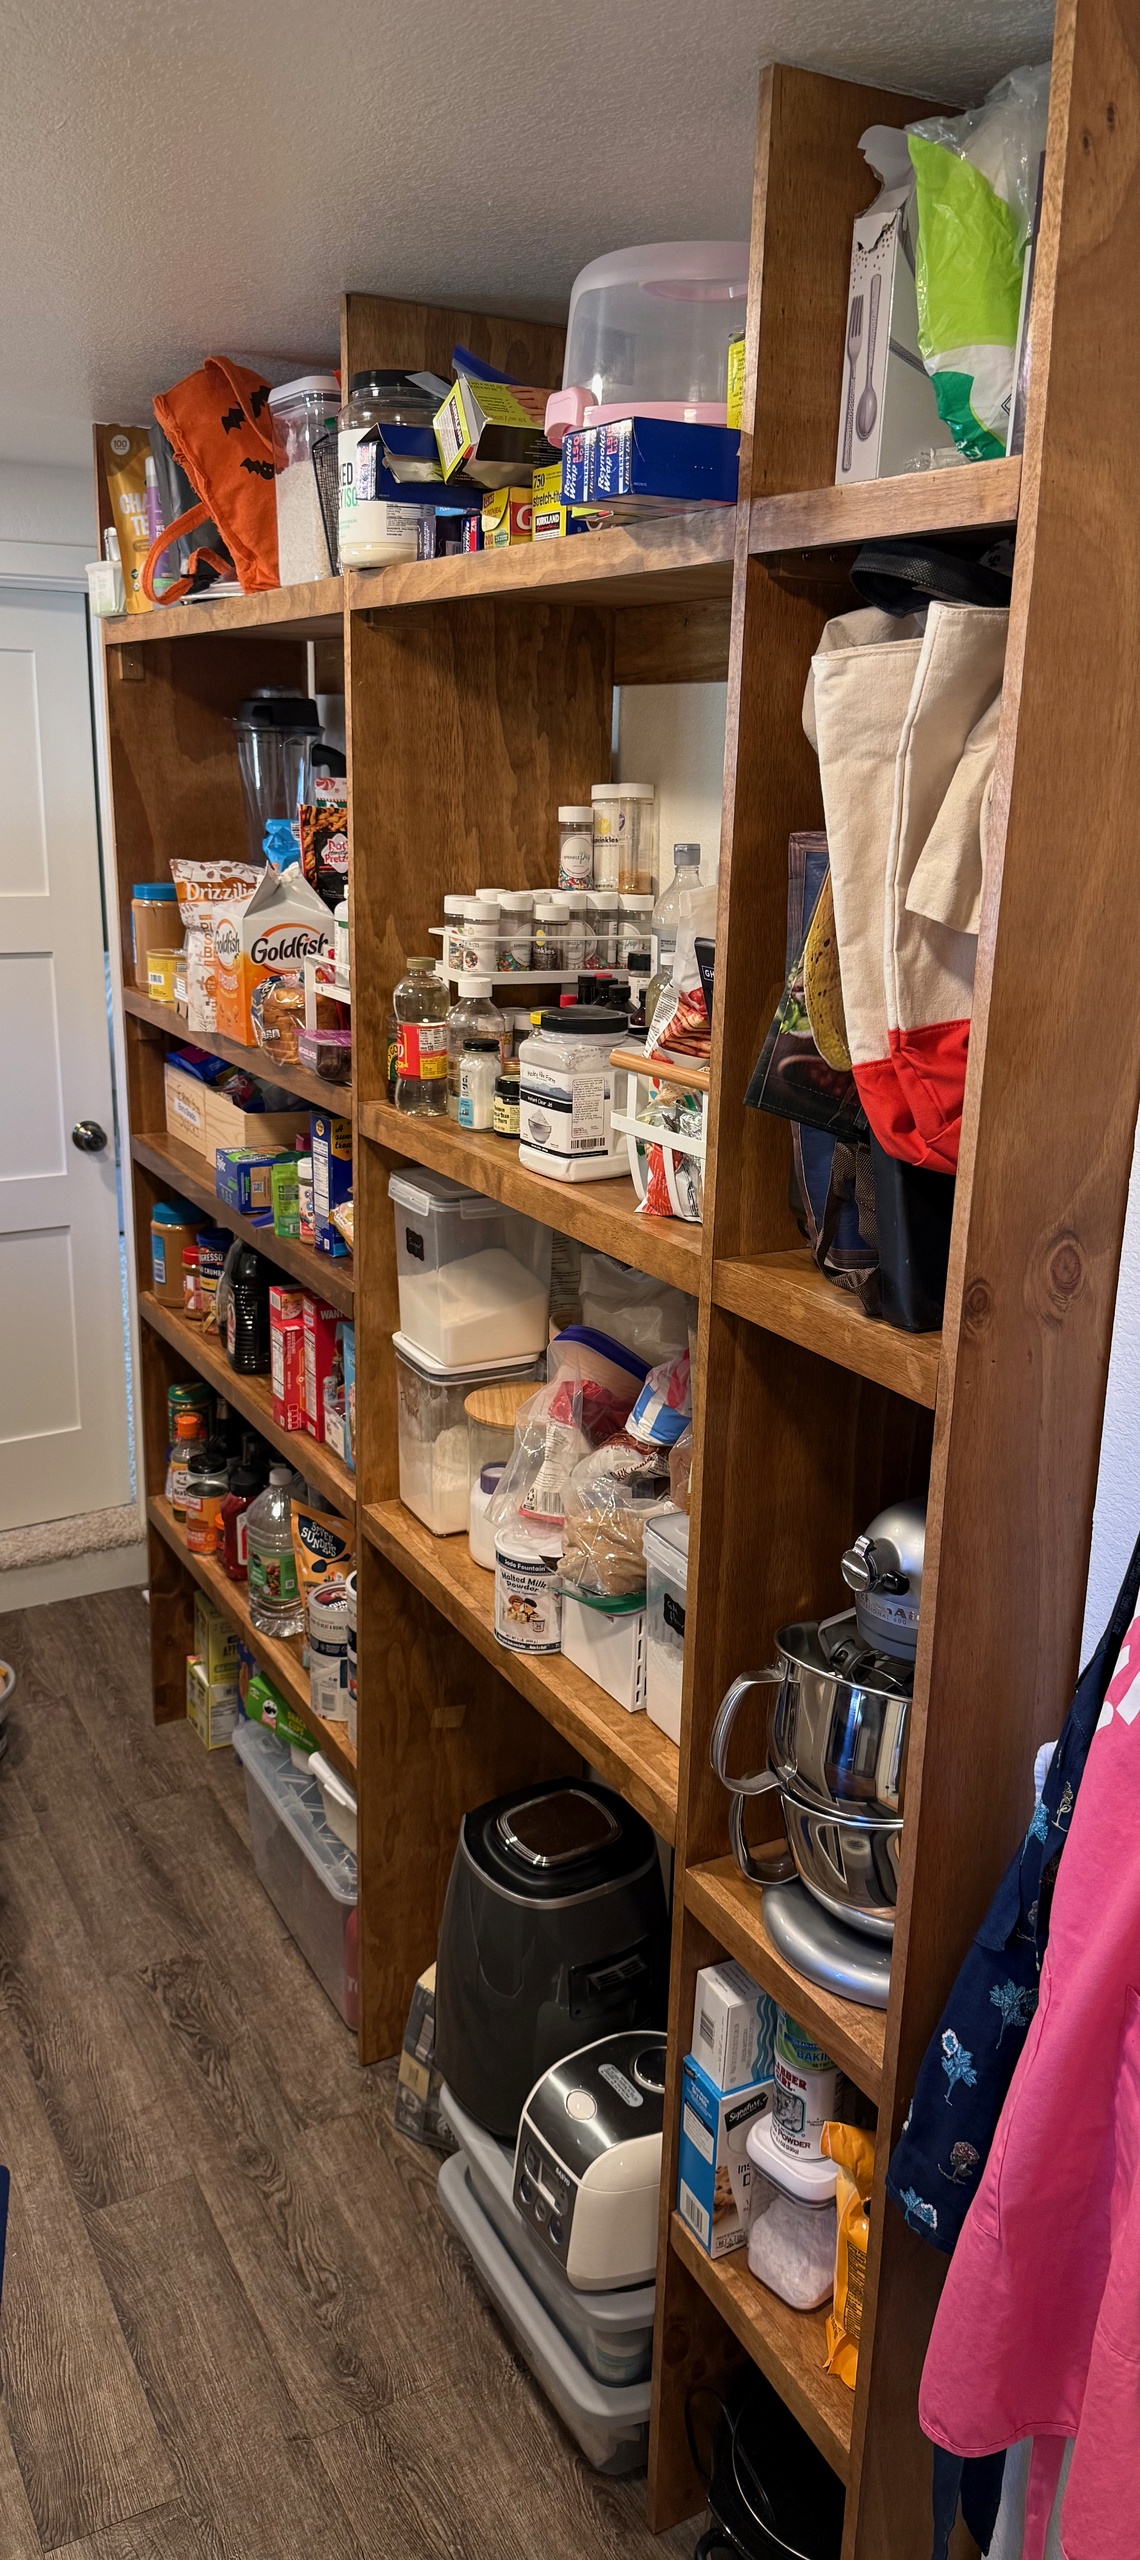
I can climb on this thing. The stand mixer lives on it. I have pulled as hard as I can at the top, and I cannot get it to even creak. It’s in there. That’s the pantry.
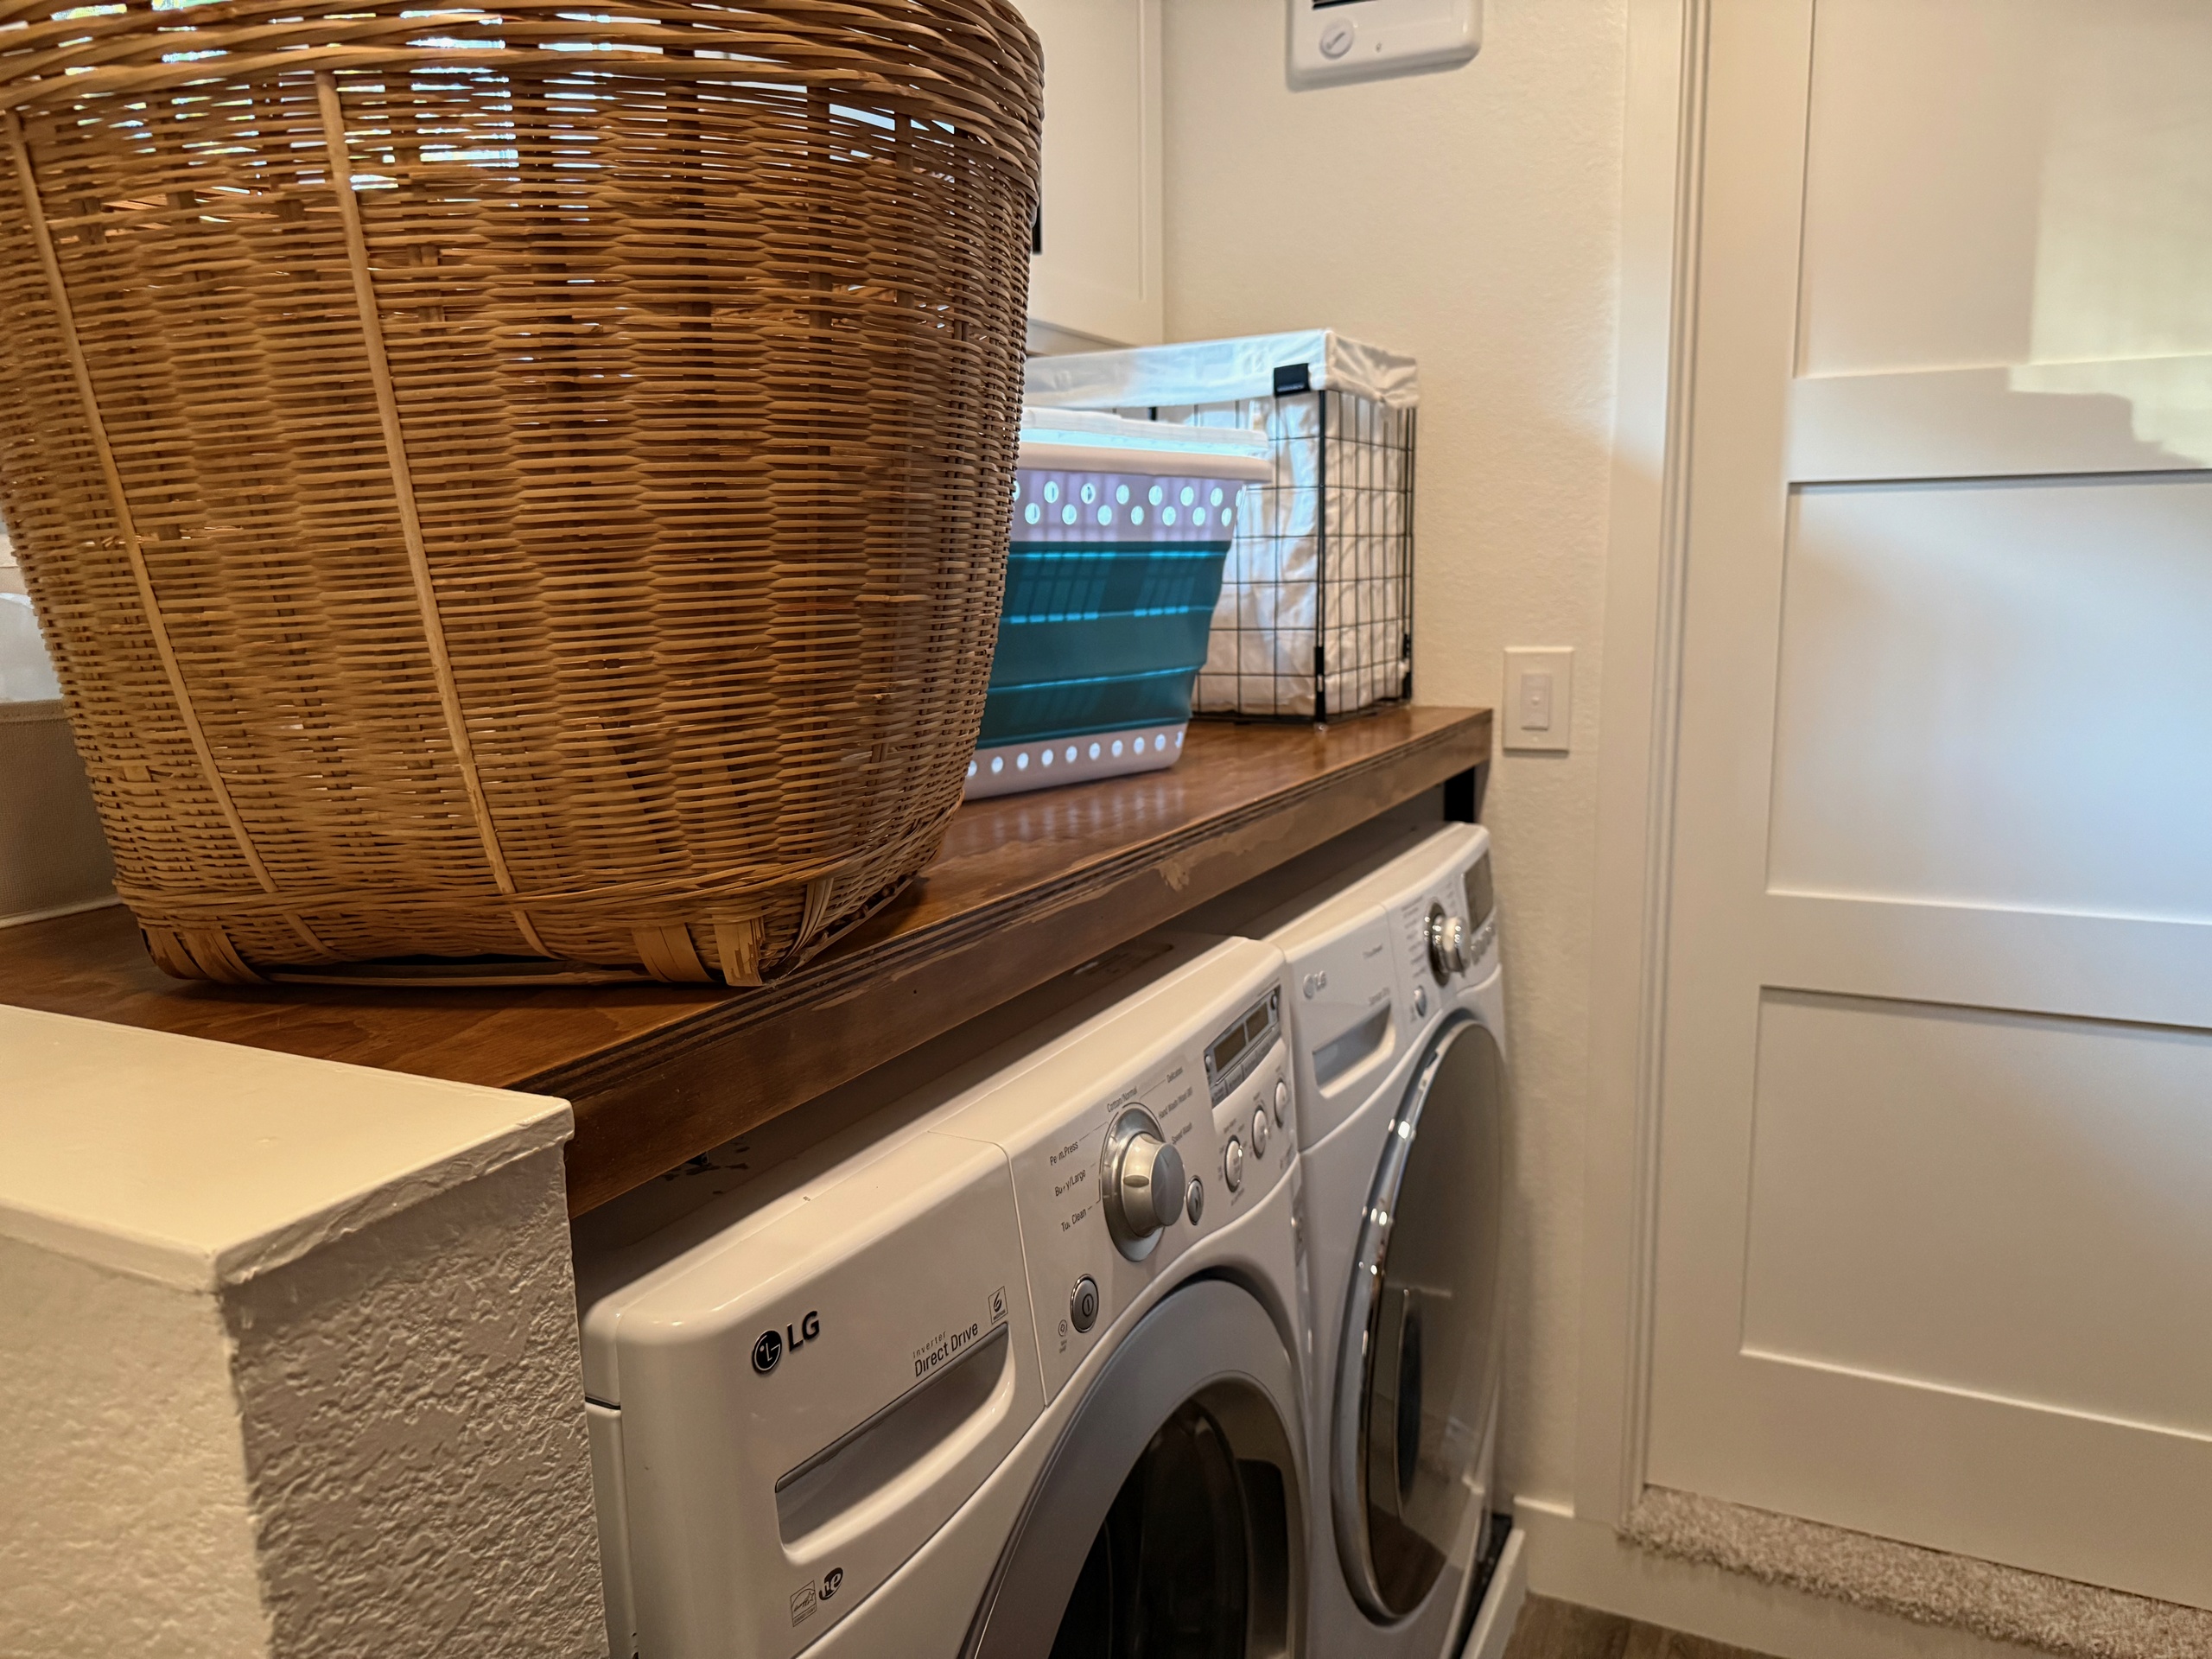
The laundry shelf was a completely different beast. It’s massive, and I wanted just a single flat surface. I hate stuff falling behind those machines or in between the machines — putting a surface over them is so much better that I cannot overstate the value-add here. So I built, scribed, and installed a shelf with nosing and rails at full length around each side. But because I may need to get at these machines (I will need to, is what I mean), I didn’t want to go crazy securing this down. Turns out there’s way too much deflection on this, so I got creative. Between the machines, at the center of the shelf, I laminated on a 1×3 poplar board running back to front, and then laminated another 1×4 poplar board all the way across the front edge behind the nosing. Then, at the center back on the wall, I installed a very heavy-duty steel shelf bracket that the house came with for that poplar board to sit on. I did the same at both sides on the front with steel shelf brackets, with the poplar resting on them. Two screws from the brackets into the poplar, and one screw at a back corner that kept lifting (this ply slightly warped after staining it), are all that secure this in place. If I bear my full body weight on the front center of this, it deflects about 1/8th of an inch, which is not too shabby at all given the width, and it’s not something I can easily do, as it is quite high. Job done on the washer and dryer cover shelf.
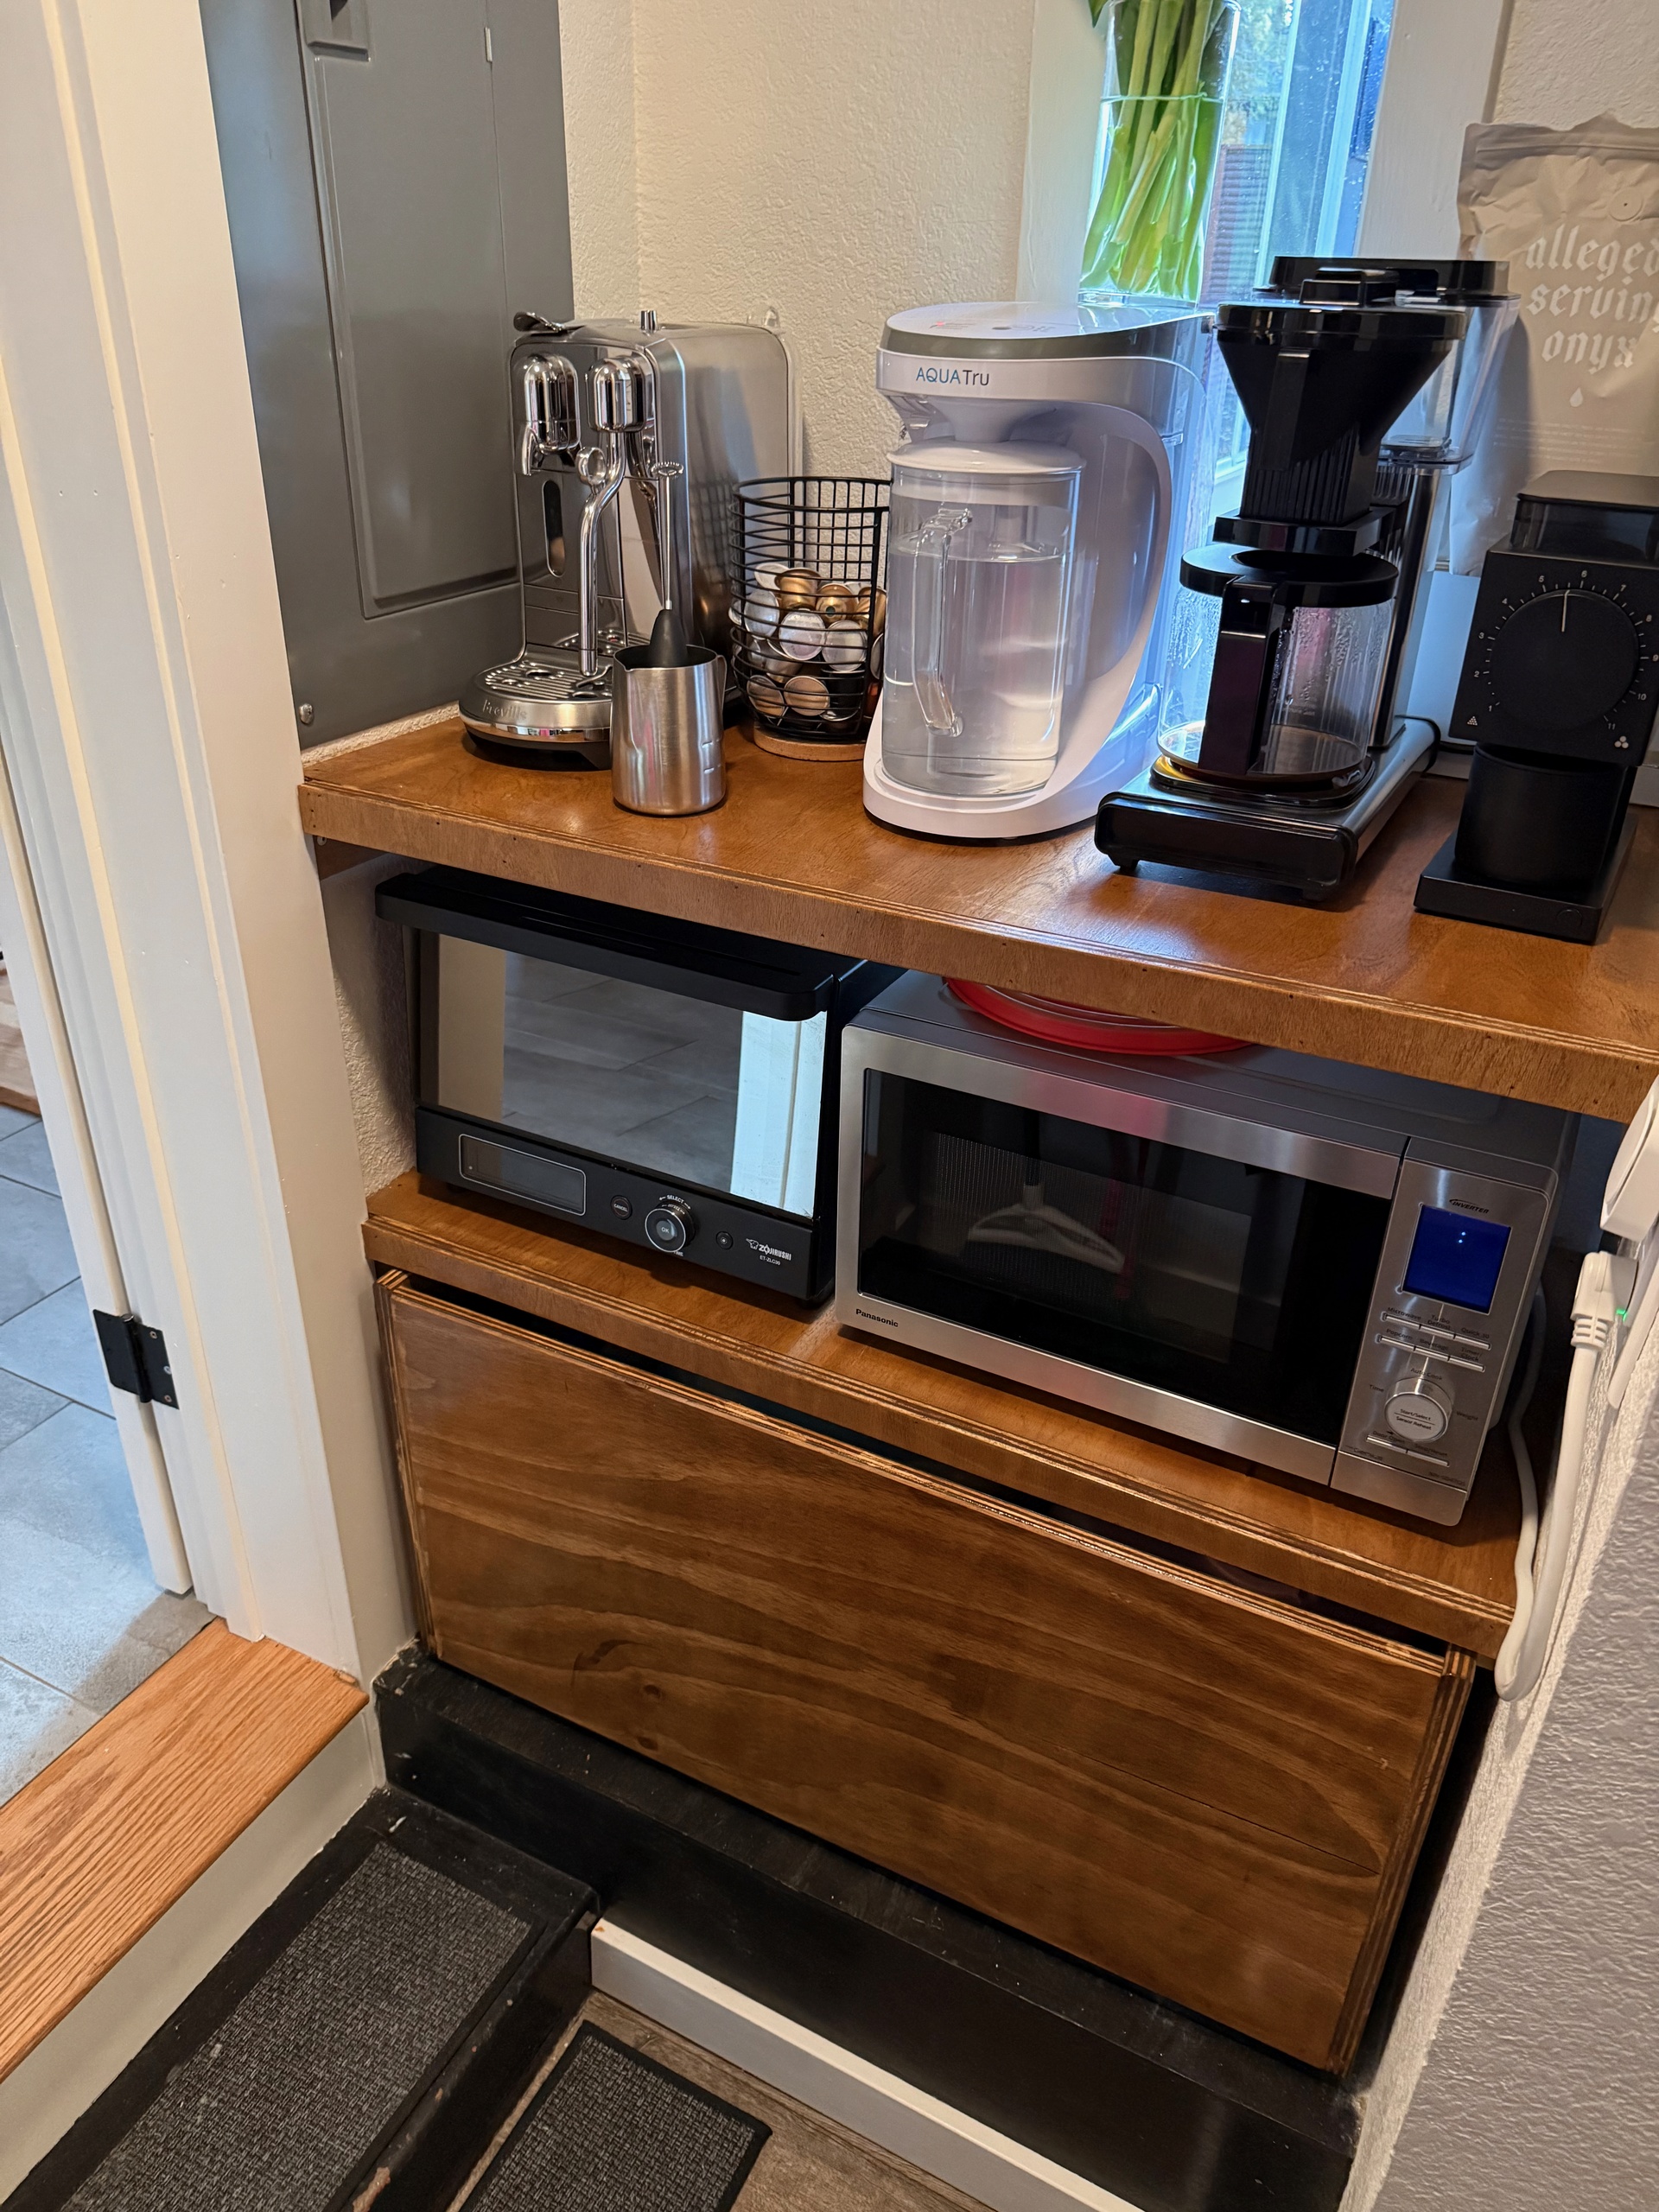
The coffee nook shelving was the same build as the pantry, same material, with nosing. Then, for the drawer, I took a bunch of the Sande ply and whipped up one of the largest (and heaviest) drawer boxes I’ve ever built, bought some seriously insanely heavy-duty bottom-mount drawer slides, and installed it. It’s a beast, and it works pretty damned well. You’ll notice that it has barely any gaps — that’s because I was going for max capacity on this one.
The entire thing is stained with a Varathane product and then sealed with a Varathane polyurethane sealer.
We’ve been using it for about 5-ish months now, and while I was very worried it would get pretty beat up, it looks basically the same as it did the day I installed it. It wipes up really easily, there’s been no real damage to anything on it that I can tell, and it would honestly not show well if there was damage given the color, finish, and lower utility quality of the materials.
Some of the trickiest things that I worried about when building this:
- Some of the pantry shelves are huge spans, and I was worried that these would really move on me once they were loaded, but they are very solid. There are very few things in most pantries which are that heavy, and if you look, they are on smaller shelves in this setup, which I designed to fit those goods better.
- The spacing on the shelves is something I love some days and hate other days, but that’s always the issue with fixed shelves. I hate shelves you can reposition, as they are not as sturdy and can fall. I wanted no chance of falling. But sometimes, that chip pile is unwieldy.
- I thought for sure the shelf over the washer and dryer would be warped by now, but nope. I guess I over-built it just enough.
- The drawer wasn’t my best work, and the guides are not great. But the entire concept is great, and I love how that space is utilized, but there are steps in front of that drawer, and it was tricky because I was a moron and built it last.
- Staining Sande plywood generally doesn’t work well, but it turned out fine enough for pantry/utility shelving. I would suggest a veneered ply if you want something that will look much better.
What I’d Do Differently Next Time
I have a lot of oops and regrets on this project, as it was one of the larger builds like this I had done at this point in time. Here’s the list of what I would have done differently.
- The Sande plywood is fine, but I should have painted it instead of staining and sealing it. It would have looked a lot cleaner on the material. It doesn’t look bad, but it’s certainly the roughest work I did. Or if I wanted wood like that, getting something veneered or even Baltic birch would have been better. This is a small regret, but my experience would lead me to different plywood next time.
- Actually, I would have bought pre-finished plywood if I were doing it again. It would have saved loads of time and it would have been really sweet looking. I had no clue that was an option when I did this project, so a little more research would have been smart on my part.
- This was one of the last projects I used that stain and sealer on — it’s not the way to go, and the finish is not that nice feeling. Totally fine for these utility shelves, but a hard poly sealer over a stain is something I am going to try and avoid going forward. It was impossible to keep some of it clean, and thus there are bumps from debris in some areas. It’s fine because nearly all of it is always covered, but that’s the only reason I have not refinished it.
- I scribed and cut the bottom of each shelf vertical so that it fit on the wonky floor, but I was so involved in that, I forgot to set a line and shim out the shelves so that they were flat across the face of them (because walls are not flat, which I knew and totally spaced on). Which means the last fucking vertical is 1/8″ too far back, and it’s all I see. I only realized it while installing the last shelves, and I didn’t think I could reset everything without destroying most of my work, so I decided to leave it. Lesson learned.
- I would have framed that utility shelf out if I were doing it again, and made it two sections with a seam in the middle so it’s easier to pull out. I would have also laminated the top, as it gets a lot of sliding on it as it is. It’s fine, and I may do that in the future when I have to remove the shelf to service something, but nah, let’s be real — it’ll need to break or warp first.
- The bottom-mount slides I bought are pretty beefy and work well, but I was an idiot and didn’t realize that they don’t come apart. I was barely able to install them, so make sure you buy slides that can release from each other. As if that’s not embarrassing enough, I bought those same fucking slides again for another project without realizing it. Idiot.
- If I had painted this, then I would have been able to put a roundover on the edges, which would have been really nice feeling. That would only work with paint, though, unless I did solid-wood edge banding.
- I would have built the drawer out of 1/2″ material instead of 3/4″. It’s fine that it’s 3/4″, but it would have been much easier to work with in 1/2″.
- Last one: I would have doubled and laminated the verticals on the shelving system so that it looks much thicker. There’s no need for that structurally — it would be purely aesthetic — but I think it would visually balance things better given the nosing on this.
Ok, that’s it, that’s all my regrets.
Even with all the goofs on this one, the wild part is that I didn’t have any wasted cuts. I somehow managed not to mess that up, and that’s the part I almost always mess up. And I did it all with a worm drive circular saw and a Kreg rip-cut thing. Not even a guide rail in sight. Got lucky, I guess.
The big win: my wife loves the utility of these.
Whew.